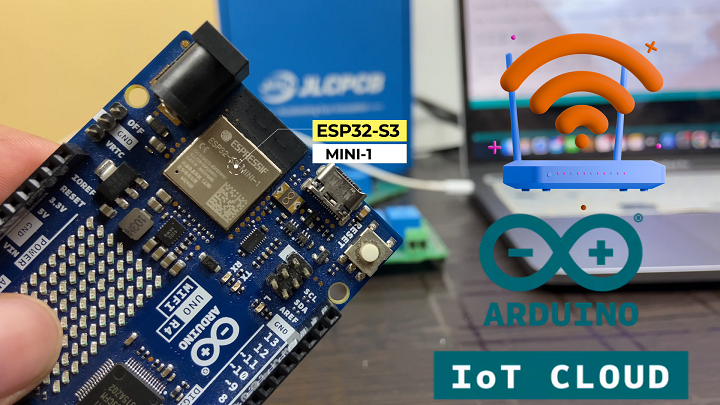
Arduino few day back launched the successor of Arduino UNO R3 board, that is , Arduino UNO R4 and it has two variants, One is Arduino UNO R4 Minima and the second one is Arduino UNO R4 WIFI.
This Arduino UNO R4 WIFI has a ESP32 chipset inbuilt, So we expect WIFI and Bluetooth connectivity. And with WIFI connectivity we got the Support of Arduino IoT Cloud as well.
This New Arduino UNO R4 board has the same form factor as the Arduino UNO R3 board. And the Pinout is exactly same as R3 board.
Having the same form factor and Pinout ,Now we can easily use all the shield or module of Arduino UNO R3 with this new R4 board.
Last year I designed a learning PCB for beginners which is kind of Arduino UNO R3 shield, Just Put the shield on the Arduino UNO R3 board and easily make cool home-automation projects….it’s a kind of plug and play thing.
If we want Bluetooth connectivity with Arduino UNO R3 we need external Bluetooth module.
Now this Arduino UNO R4 Board has ESP32 Chipset inbuilt so no need of any external Bluetooth or WIFI Module.
Using this shield with the Arduino UNO R4 WIFI Board ,Now we can easily Make IOT Project as well.
In this Article, I will let you how can we make a home-automation project using this Arduino UNO R4 WIFI board & Arduino IoT Cloud.
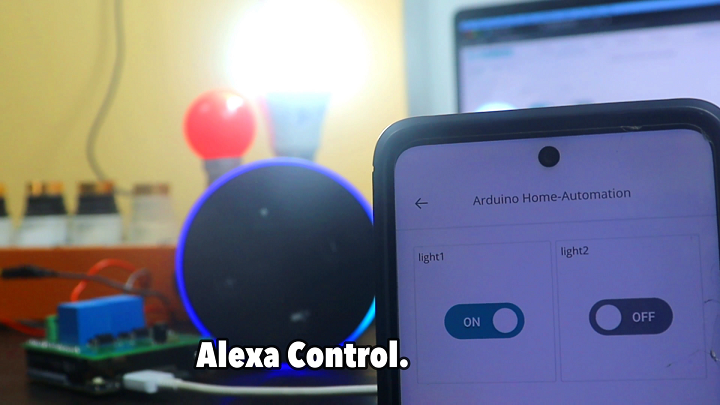
With this Project, we will able to control two relays using a smartphone App , from web dashboard, from IR remote and from the Alexa smart speaker.
This is going to be very easy and interesting home-automation project.
PCB Design.
This is the Schematic of PCBs. If you want Your own custom designed PCBs, Then you can download this schematic.
After making the Schematic, Convert it into PCB, Arrange and place all the components in desirable places, Once the layout is ready route the wiring and complete the design of PCB.
After The completion of PCB design, You need to download three files which will required during PCB order. These files are BOM, Gerber and CPL that is pick and place file.
Ordering the PCBs at JLCPCB.
This project is sponsored by JLCPCB. JLCPCB is a full feature Printed Circuit Board manufacturing service.
Turn your DIY breadboard circuits into professional PCBs– get 10 boards for approximately $5 + shipping (which will vary depending on your country).
Once you have your Gerber files, you can order the PCB. Follow the next steps.
1. Download the Gerber files –click here to download the.zip file.
2. Go to JLCPCB website and Click on Quote Now button.
3.Upload the Gerber file you downloaded in the last step. Upload the.zip file or you can also drag and drop the Gerber files.
After uploading the zip file, you’ll see a success message at the bottom if the file is successfully uploaded. You can review the PCB in the Gerber viewer to make sure everything is good.
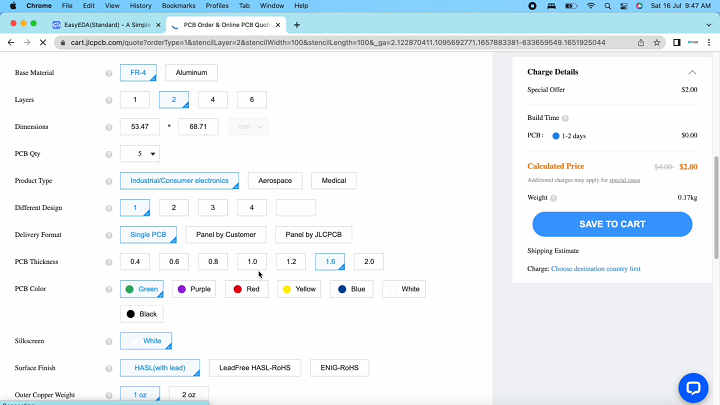
JLCPCB can grab all the PCB details and automatically fills them for you.
Select the PCB quantity and color masking of PCB by your self. I am selecting green color. After that Click on Save to cart to complete your order. And here if you select the fastest shipping option you may get the PCBs delivered at your desired location within a week
After seven days, PCBs arrived at my place. As usual the quality of PCB is very premium, and the Components are soldered very well. Traces are perfect, silkscreen is fine, Green color PCB masking looks very beautiful and PCBs look pretty professional.
Do try Ordering the PCBs for your next projects from the JLCPCB & not only that, JLCPCB also provides the PCB Assembly services and the 3D Printing services.
Arduino IOT Cloud.
Open Arduino IoT Cloud webpage, You need to create your account on Arduino Cloud.
If you already have account just sign in using your login credentials.
First we need to create thing, Click on create thing button.
Give any name of this thing, I am giving it My Arduino Uno R4, then click on add variable.
Here you need to give the name of this variable, I am giving it light1.Then select the variable type as Alexa compatible , because we want to control our device using Alexa as well, then select variable type as light and leaves the all rest of thing as it. Then click on add variable button below to complete the configuration of this variable.
In similar way create another variable as we want to control two relays, this is a two node home automation project.
Now click here on this icon to associate the Arduino Uno R4 board.
Click on setup new device….here we have to select which device we want to setup , third party device or Arduino board, Arduino Uno R4 is Arduino board, So select Arduino board.
After installing the Arduino create agent it will automatically detect the board if it is connected to your computer…..as you can see it found my Arduino Uno R4 board
Now click on configure button, Give the name of your device.
Hear a device ID and a secret key is generated and this key and id is very important, this cannot be recovered once it is lost, So keep it safe. Just download the pdf file and keep it safe we need this secret key later. Now click on continue after checking the box .
To use Arduino IOT Cloud with Arduino UNO R4 we need to install a firmware into this Arduino Uno R4 Board. Arduino create agent will check if your board has firmware installed or not and if not it will automatically install into your board.
Now click on the configure button , here we need to give the name of our WIFI that is SSID and the password as well, and the Secret ID that we generated earlier , Open that PDF file and copy the secret ID and paste,
Now click on dashboard, then click on build dashboard, Give the name of your dashboard.
Then click on add button, here click on things , the one that we created earlier.
Then click on create widgets, You will got two button added automatically as we want to control two relays.
Again click on things, then click on sketch. You will got a basic template of code for the project.
Open full editor, we can edit or even we can upload this code from here only , this is an online IDE. But I am not going to use it rather I will use Arduino IDE.
Code.
This is the final code of our project.. I have modified the code and added IR remote control part as well….here our both the relays are connected at pin 7 and pin 8 and IR sensor is connected at pin 11.
Hear you need to add the hexadecimal value of your IR remote button.
And the code for retrieving hexadecimal code is available in the description.
And the rest of the code is pretty simple, You can easily understand this code just go through it. One more thing this code is not going to work for your Arduino board because this code is generated for my Arduino board device ID only, Well you can use this code as a reference.
Upload the code, After selecting the right board and right communication port.
Arduino IOT Cloud: Mobile DashBoard.
To control the appliances from the smartphone we need to Download this “Arduino IOT Remote” APP , And this app is available for both iOS as well as for android. download this app and then open.
Now login with the same account that you were created on the Arduino IoT Cloud webpage,
And here it will automatically detect the dashboard that we created earlier on the Arduino IOT Cloud page.
As you can see both the button widget are available here, Now we can easily control the relays from this App as well.
Make sure to use the same account as you have used in making the dashboard and things in the Arduino IOT Cloud webpage else this not gonna work.
Alexa Integration.
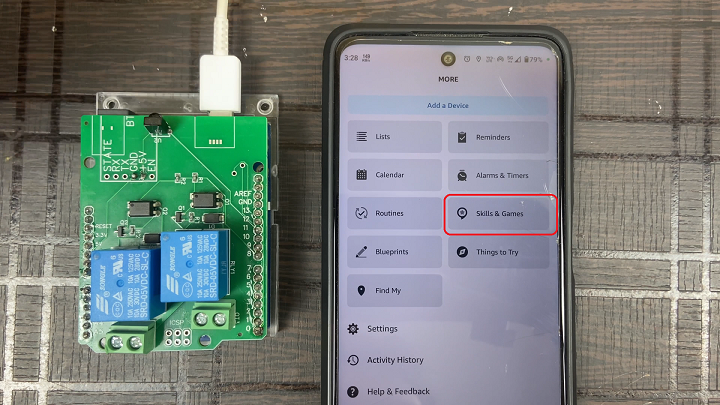
Now let’s integrate Alexa, .for this open Alexa app, then click on more in the bottom right corner, after that tap on skills and game.
Here search for Arduino IOT Cloud, tap on this button which says “Enable to use “, by doing this your Arduino account is successfully liked with the Alexa.
Here as you can light1 and light2 two device is showing here. Now we are able to control the relays from this Alexa app too along with the Alexa speaker.
Connection Diagram.
NOW Connect the bulb or whatever device you want to control as per this circuit diagram.
Now everything is done let’s see project in action.
Now we are able to control our home-appliances from the web dash-board, from the Mobile Dash-board, from the Alexa smart speaker and from the IR Remote.
That’s all for this Article, I hope you have enjoyed this Article and learned something new.


: A Transformative Leap into the Future")